Month: December 2013

The Importance of Visual Schedules

A Pictorial or Visual Schedule allows young children (with special needs or typical) to know what is coming next in their day. It takes away anxiety because they can “read” pictures with ease. Just as we adults read the clock, or our Smartphones in anticipation, children feel the same anxiety. They just show their anxiety by rolling on the carpet, touching other children, talking and “not sitting still.”

Before I explain how to set up a visual schedule, I want to explain what can happen if you don’t have one. Children with Asperger’s, Autism or even gifted children can become upset when they do not know what will happen next or when the teacher changes the schedule. Or, if recess is cancelled due to the weather-this can truly rock some children’s world! However, when you ALREADY (the key word is already) have a visual schedule in place-then you can actually add new things to the schedule and it will NOT upset your students. They will actually already understand that they follow the schedule and “oh look, there is something new on the schedule that I will follow now.” I PROMISE-it works! This is why I capitalized it!

I actually met with a behavior specialist and asked him why it worked so well. He explained that it works because of its consistency. If you look through the pictures below, you will notice a tiny little die-cut of a fire truck, Santa Clause, Pumpkin and more. These were all special events at my school this year. I popped those pictures on the schedule and instead of anxiety from my special needs children, they said “what’s that?” I explained what it meant and what we were doing. The day before, I also explained, as well. As we went to that activity, I also gave them their very own die-cut to hold. So, when the fire truck visited, I gave them a fire truck die-cut as their “ticket” to see it. As we walked to the truck-they were excited!

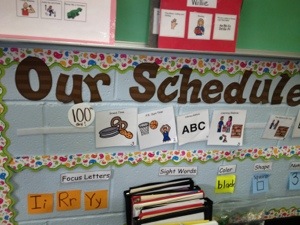
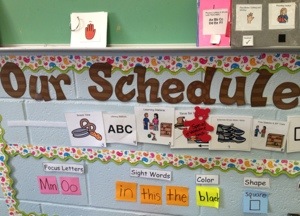
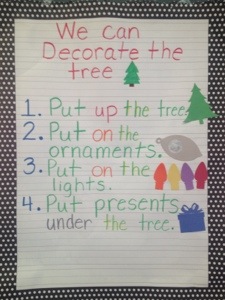
Ok-moving on…..this is how I set up and use my visual schedule:

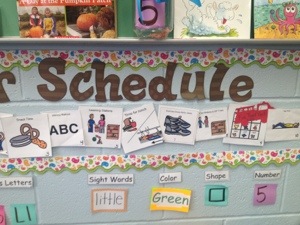
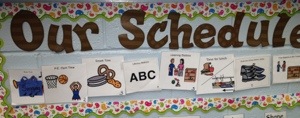
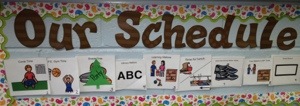
I placed a long velcro strip on the wall (yes-it will pull the paint off-eek! but it is worth it). Then, I made these pictures using Boardmaker Software. I laminated them and then added velcro to the back. Then, I place the pictures in my order of the day from left to right. There are 11 pictures total. As soon as we finish one activity, we sing the song and I take off the picture and place it in a little yellow pocket nearby the schedule. As I am doing this, I sing this transition song “Lunch time is finished, lunch time is finished, lunch time it finished, NOW it’s time for Exercise (of course whatever is finished, you change the word each time).” My students like to sing this little rhyme with me too! To keep order in the classroom, I teach them that it is the teacher’s job to take pictures off the schedule.

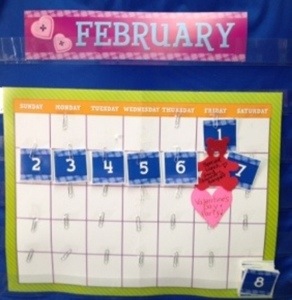
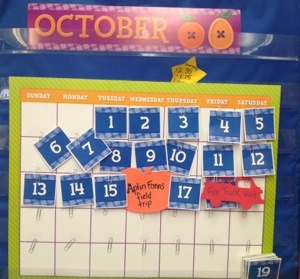
The Fire Truck visited on this day.

20131228-060323.jpg


I also put the fire truck die-cut on the calendar to show when it would be coming. Earlier that same week, we went to the farm for pumpkins. It could have been a stressful, crazy week-but it wasn’t. It was fun for all! Oh, the yellow star is our Library day visual reminder.

20131228-060339.jpg


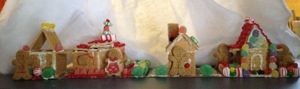
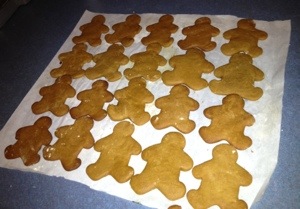
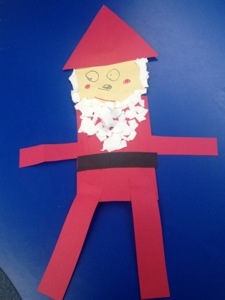
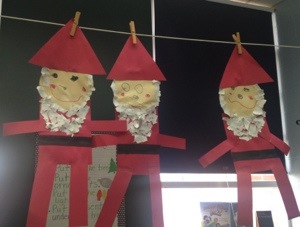
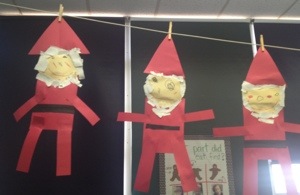
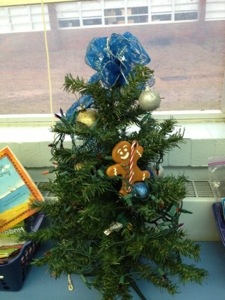
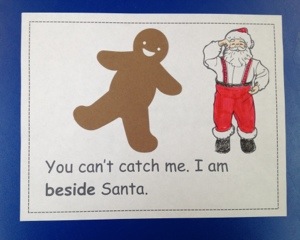
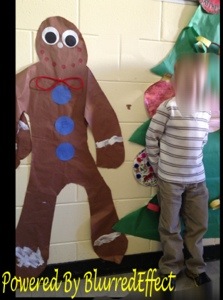
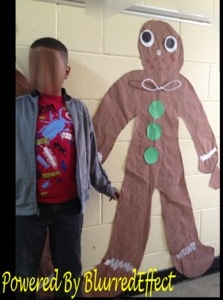
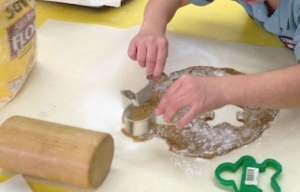
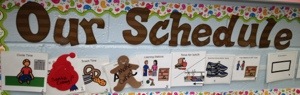
Santa Clause visited our School on this day. We also made Gingerbread cookies on the same day. This was definitely on a Friday!

20131228-060413.jpg


This was our Polar Express movie day where everyone wore pajama’s, watched the movie and drank hot chocolate.


20131228-060443.jpg


The Little Blue Christmas present below is what I used for our “School Christmas Sing Along.” Finding a die-cut for that was impossible. The present worked just fine.

20131228-060454.jpg


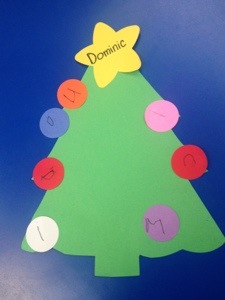
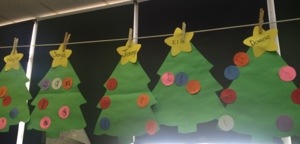
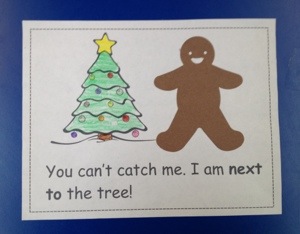
Christmas Party Day – See the green Christmas tree?

20131228-060501.jpg


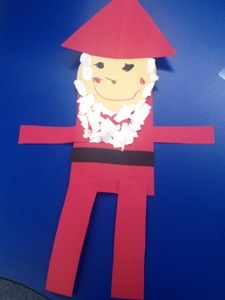
Santa Clause picture day!

20131228-060905.jpg


I hope this is helpful and please send me any questions. I’d be glad to answer them! Happy teaching! -Andrea

20140217-190530.jpg

20140217-190550.jpg

20140219-090404.jpg

I Can Build A Gingerbread House!

Gingerbread house making is so much fun, for my younger and older children and me as well!

We have made those houses and trains from the kits, but these homeade gingerbread houses are the best and the most fun! It is also fun to build in the classroom, if you have extra classroom help like parents or a teacher assistant. 

Step by Step Picture Directions of “How to Build a Gingerbread House”

1. Carefully open the Graham crackers, so that none will break.

20131227-223644.jpg

2. Carefully snap the rectangle crackers into squares.

20131227-223657.jpg

3. Get your work area ready. My daughter, here, is VERY ready!

20131227-135939.jpg

4. Cut out cardboard bases for each gingerbread house from the Graham cracker box or any box you can find.

20131227-223705.jpg

5. When you flip it over, no one will ever know.

20131227-223717.jpg

6. Make a strip of icing on the base, so that you can begin “gluing” your first Gingerbread wall to the base. Hold it there for about 30 seconds, or until it no longer flops down.

20131227-223735.jpg

20131227-223748.jpg

20131227-223810.jpg

20131227-223830.jpg

7. Repeat. Add your second wall by adding more icing.

*************************

Pause for the most updated 2016 Pictures!!!!!

**************************

unpause—–Continue with directions……..

8. As you add more walls, the house becomes more sturdy.

20131227-223954.jpg

9. Oh, look how cute the house is looking!

20131227-224002.jpg

10. This part can be more tricky. If you keep your home or class a little colder than normal, it helps the icing stick better for some reason. The triangles were made by cutting one square in half.

20131227-224020.jpg

11. Now, add the top of the roof. Be sure to add icing to hold it all together.

20131227-224031.jpg

20131227-224039.jpg

20131227-224102.jpg

20131227-224115.jpg

12. Or, you can just add a square on top and skip those other steps above.

20131227-224127.jpg

20131227-224133.jpg

13. Now, gather your candy. Eat some.

20131227-224222.jpg

14. Now, go decorating crazy!

20131227-225435.jpg

20131227-225445.jpg

20131227-135947.jpg

20131227-141150.jpg

20131227-141200.jpg

20131227-141207.jpg

Here is our little Neighborhood!

20131227-141223.jpg

Scroll down for the Recipe and Directions, so you can make your own Gingerbread houses too!

Sidenote & Reflection…..In 2011, I wrote: “This is the second year I will be making Gingerbread houses with my own children and my Kindergarten students. This is a fun way to incorporate Recipe reading and following directions step-by-step. Thanks to some other wonderful teachers, I was able to learn the basic rules of gingerbread mastery! Granted, it was a little stressful the first time, I am now ready to take on this tradition yet again. I also found so many other teachers & parents who are doing the same thing! It can be done with fun!” My, oh my, how my children have grown. These pictures here are from 2 years ago-wow! 

We put the candies into coffee filters, to keep them from rolling all over the table. Our children are 3, 5 and 7 here.

20120106-230541.jpg

I made the base of the houses first and let the icing dry for one day. The next day, I let the kids add the candies with their royal icing. They dipped their candies into the icing then added the candy to the gingerbread house.

20120106-230608.jpg

Our little one enjoyed adding cereal and marshmallows to his little house. Whatever you have on hand always works best.

20120106-230626.jpg

Gingerbread House Ingredients:

Brand Name Graham Crackers – 1 box

1 pound of Confectioners Sugar

3 eggs

Vanilla (optional)

Cream of Tartar (for Royal icing-do not skip this)

Candy Suggestions -Red hots, gum drops, Spearmint leaves, Lemonheads, M & M’s, round mints

Directions:

Choose a base, like a small paper plate or a piece of cardboard, to place the gingerbread house on. You will need 7 graham cracker squares for each house,  4 for the sides and 3 for the top. Allow time for the bottom to dry before creating and adding the roof with the icing.

To store and use the icing, you can choose either a ziploc bag, an icing bag with a decorator tip or a squeeze bottle. Just recently, I started using some cute little bottles from Wal-Mart, which are very convenient.

Royal Icing Recipe (Compliments of J.Thomas)

1 lb. powdered sugar

3 egg whites

1/2 t. Cream of Tartar

1/2 tsp. vanilla extract (optional) this adds nice flavor!

Beat egg whites until frothy, for about 7 minutes (I always beat it by hand). Gradually add sugar and Cream of Tartar.  The icing should be a little thicker than Elmer’s glue. Place in a bag or container. It can be kept in the refrigerator for up to a week.


The ABC’s of Teaching Letters

The Importance of Letter Names and Sounds

What is the first step in teaching a child to read? Letters and sounds instruction is the key! In simple terms, for a child to learn to read independently and construct meaning from text – he needs to be able to identify words automatically. He can do this after he decodes unknown words. In order to reach this point, children have to first learn the 44 speech sounds of letters and more than 100 spellings that are made. So- first, identify letter names and then, produce letter sounds. Then, he will be prepared to read! The next step is to implement a carefully planned and systematic presentation of explicit letter/sound teaching.

Which Letters Should Be Taught First?

The hardest question for researchers and professionals to answer is – “What order should the letters be taught?” Although there is not one universal answer to this question, there is great data to give professionals guidance in creating and/or implementing the necessary systematic order of instruction.

When deciding the order to teach the letters, please keep in mind what research says.

What Does Research Say?

  • Some letters are harder to learn than others: U, Q, V
  • The following letters are most well-known by children, even if they have not been taught them: O, A, B
  • Children are most likely to learn the first letter of a their name more easily and quickly
  • Teach the letters in an order that allows a child to form many words with them (for example: C, M, A, T)
  • Begin with letters that make “simple sounds” that are easiest to stretch out and are easier to blend: M, S, F, R, N, L
  • Teach new sounds in small steps
  • Review previously taught letters and sounds
  • Introduce commonly encountered sounds before the infrequent sounds: For example, “A” occurs more commonly than “Q” or “V.”
  • Teach the letters that occur more frequently in most words. The most commonly occurring letters are: E, T, A, I, N, O, S, H, R, D, L, C
  • Introduce vowels early. A child must know the vowel sounds, in order to make and read words.
  • It is suggested to teach graphemes together, like C and H, C and K, T and H
  • Alphabetic order is not ideal because it does not address the needs listed above
  • Do not pair and teach together letters that are auditorily and/or visually similar: E, I and D, B
  • Introduce some continuous sounds early: M, S
  • One study suggests introducing lower case letters first, unless upper case letters are similar in shape: (Similar: S, s, U, u, W, w; Dissimilar: R, r, T, t, F, f) Note: I have always taught capital and lowercase at the same time: Ss, Rr, Tt, so I do not disagree with this study, I myself and just unfamiliar with its effectiveness
  • Do not teach similar looking letters together: b, d, p, q
  • Introducing letters in isolation may confuse some children about the purpose of letters in relation to words and reading
  • Some letters take longer to visually discriminate: t, a, e, o, s, i

The many resources below provides suggestions for the sequence of teaching letters and sounds.

Sources:

http://www.readingrockets.org/blog/53818/?utm_source=Twitter&utm_medium=Hootsuite&utm_campaign=RRSocialMedia

http://livingmontessorinow.com/2010/09/07/in-what-order-should-you-introduce-letters-to-your-preschooler/

http://www.righttrackreading.com/teachphonemiccode.html

http://reading.uoregon.edu/big_ideas/au/au_programs.php

http://www.ciera.org/library/presos/2001/2001nrc/01nrcstahl/01nrcsta.pdf

http://www.ascd.org/publications/books/104134/chapters/phonics-and-word-study.aspx

Gingerbread Bakery-Simulated Field Trip!

Eating Gingerbread cookies is yummy and fun! Reading about them is enriching….but shopping for the ingredients and making them at school is MAGICAL and memorable!

I set up a “store” in my classroom where I put out every item needed to make gingerbread men (butter, molasses, the baking sheet, etc.). I then gave every child a large brown bag and $3. They shopped for and chose 3 items. A few students used a list that I made, which had pictures on it- and this showed them what I wanted them to buy. This worked wonderfully for my students with autism, as it gave them my expectations in pictures. After shopping everyone was seated at one table, I called out the ingredients and we placed them in the center.

We then read and followed the recipe. The mixing began! The flour flew and spilled and it was oh so much fun! After refrigerating the dough for an hour, the children had fun rolling it and using gingerbread men cookie cutters. They put them on the cookie sheet and then we all went to the oven, put them in- and waited. While waiting with our timer for 8 minutes, we read Christmas books in the library! The timer beeped and the students wondered if their cookies would run away?! I opened the oven and one student ended our lesson by saying, “look, they are gingerbread babies-and they are sleeping!” Our children are precious!

You can download more detailed instructions and printables for this simulated Bakery lesson
from my TpT “store” atby clicking on these words

20131216-001129.jpg

20131216-001145.jpg

20131216-001203.jpg

20131216-001231.jpg

20131217-200247.jpg

20131219-051259.jpg

20131219-051311.jpg

20131219-051323.jpg

20131219-051408.jpg

20140525-225202.jpg

20140525-225247.jpg

20140525-225306.jpg

20140525-225339.jpg

Gingerbread Writing and Reading Kindergarten Activities

gingerbread-girl

Oh how we love the gingerbread man! We were busy reading, writing and demonstrating prepositions with a take home book. Then, we wrote and read about parts of a gingerbread man. Then, sequencing a cut up sight word sentence. Graphing the first part of the cookie that was eaten first was the next activity. You can download the printables from my TpT “store” here: http://www.teacherspayteachers.com/Product/My-Little-Gingerbread-Man-Mini-Unit-by-greenbeankindergarten-1005374 as a part of a mini-unit

gingerbread unit

PREPOSITION Book – This is printable and all you need is a gingerbread die-cut for the students to glue and add to the correct place as you are teaching “where” to place him.

20131215-005338.jpg

20131215-005154.jpg

20131215-005210.jpg

20131215-005227.jpg

20131215-005240.jpg

20131215-005253.jpg

20131215-005316.jpg

SIGHT WORD Sentence Cut Apart and Writing Book – This is great for reading, writing and fine motor work.

20131215-005606.jpg

20131215-005444.jpg

20131215-005506.jpg

20131215-005523.jpg

This is the famous “First Bite” Chart that is not my original idea. You simply pass out a gingerbread cookie (I like the Little Debbie brand). Have the children take a bite and ask them which body part they ate first. Then graph it either with their picture, a gingerbread die-cut, or by them writing their own name under the correct section.

20131215-034359.jpg

Fun Gingerbread Craft-ivity! My wonderful teacher Assistant created this with our students. She reviewed the body parts and discussed 2 legs, 2 arms, 2 eyes, 1 mouth, 1 stomach and then decided which body parts of the gingerbread man were real shapes (the stomach, the head and the eyes). Next, the children chose and named the color and amount of buttons they wanted. Oh, how we just love how they turned out!

20131215-034429.jpg

20131215-034443.jpg

RHYMING MAN – Here is our cute little dude that is helping us learn to rhyme words. This is quite possibly one of the hardest pre-reading skills in kindergarten! Rhyming can also be kind of boring, but our students had a lot of fun rhyming with the gingerbread man. First, I drew him on this chart paper. Then, I passed out only words that DID rhyme with -an and MAN. So, I set them up for success. Any word that they said or read to me WAS a word that rhymed with man. Then, I modeled how to write the word. After the 5-10 minute whole group lesson, this then became a small group lesson. I placed a double set of flashcards for the students to play “Memory,” and find 2 words that were the same and matched together. In another station, I placed the Rhyming man chart and placed a set of the flashcards for the children to match on top of the written word. For the next day, I drew a TREE and we did the exact same lesson, but with words that end in /-e/. On the third day, we sorted /-e/ and /-an/ words. Download the printable and 3-day lesson here: http://www.teacherspayteachers.com/Product/Rhyming-Word-Sort-Simple-Printable-1015046

Gingerbread rhyming image

20131215-034557.jpg

20131215-034617.jpg

20131215-034626.jpg

20131215-034645.jpg

Cute gingerbread clipart from: http://www.mycutegraphics.com

20131217-200633.jpg

20131217-205544.jpg

20131217-205553.jpg

20131219-051505.jpg

20140525-225559.jpg

20140525-225637.jpg